Showing posts with label sewing. Show all posts

October 2, 2012

Shorts on the Line - FREE PATTERN!

This is a repost from the SHORTS ON THE LINE series.
-----------------------
Hi everyone!  I'm Becky and I like to sew.  I blog at Owly Baby and sell children's sewing patterns at Owly Baby.com

I'm so excited to be a part of the Shorts on the Line series that I've made 3 pairs of shorts in one week!  This doubles the amount of shorts in my wardrobe.  A bit of selfish sewing makes me feel pampered!

In order from left to right - 
The SWEET SCALLOP SHORTS from Pattern Runway on Etsy (for sale HERE). 
My very wearable (4 days in a row!) turquoise tester/muslin cuffed shorts. (self drafted pattern)
My super stylish leopard cuffed shorts.  (self drafted pattern, FREE pattern link below)


SWEET SCALLOP SHORTS (pattern: Pattern Runway)

The fit was great on the Sweet Scallop shorts from Pattern Runway.  The instructions were very clear and included tips on fitting and choosing the right size.  The cutting and sewing diagrams were very helpful and I learned how to sew a single welt pocket.  These shorts would be great for a motivated beginner or intermediate sewer.

I didn't think the welt pockets would go well with the casual look I was going for, so I did make a few adjustments. I didn't apply any pockets to the backside, I shortened the overall length 1" and added the scallop shape to the back of the shorts.  I redrafted the back hem facing and added a drawstring waist instead of a side seam invisible zip.  

scallops hem on back
I love the scallop shape at the hem and even though they are drawstring shorts (and feel like jammies), they still feel nice enough to wear out for errands and playdates.  I do have to wiggle a little to get them over my hips, and in hindsight I should have added .25" on each side seam because I did remove the side zipper, but it hasn't overly strained any of the seamlines yet.

The fabric is a Lisette Twill from JoAnn's.


CUFFED SHORTS - FREE PATTERN from Owly Baby

Now, on to the turquoise testers and fancy leopard shorts. Lucky readers, you also get to join in the sewing shorts fun.  I'm sharing my pattern with you for FREE!  It will fit anyone who wears a Ready-to-Wear size 4 (store sizing).  For reference, it should fit a 29" waist, 37" hip.  It is a self drafted pattern that is not entirely perfect - I've only used twice, but I have been wearing my shorts non-stop!  They fit great on me, so if you're around the same size - I hope they will work for you.   

First zipper and belt loops!
The center back seam has been modified - shallower curve.  The back legs will also "hug"
closer to legs than shown in this muslin.

I've also written up some instructions for you to follow that include helpful links on how to sew single and double welt pockets, AND how to sew a fly zipper.  This was my first time sewing using a fly front zipper AND a welt pocket (and belt loops!).  If I can do it, you can too!  Click below for the FREE PATTERN and instructions.


FREE Cuffed Shorts Pattern Pieces (Size 4 RTW)

This pattern is for personal use only.  
Copyright Rebecca Ruud, 2012.   All Rights Reserved.
This leopard fabric has definite stretch, refuses to be ironed and snags easily.  
It was horrible to work with but it feels wonderful to wear!

In short (pun intended):  I've been wearing my three new pairs of shorts non-stop!  They were totally worth the effort and I loved learning how to put in the fly zipper.  I am now putting in fly zippers in EVERYTHING!


I hope you're inspired to join the Shorts on the Line Sewalong and win some fabulous prizes! 


Happy sewing and shorts-wearing!


VERY Helpful links:

September 17, 2012

Spiderweb Block tutorial and template


I've been slowly catching up on my sewing projects.  Preschool has started and so I have a few extra hours a week to work.  This is my first spiderweb block for Lee in my Bits and Pieces quilting bee group.  I hope to finish the other block tonight!  The finished block measures 10 3/4 inches.


The block Lee designed for her quilt and her tutorial can be found here:
Naturally Neutral and Webby Quilt.   
I've made a free template based on her instructions that you can download and print HERE.  


I'll show you the process of making this quilt block - if you scroll down really fast, maybe it will look animated! 


print out the template on 8.5 x 11 paper


cut along the dotted lines


Fold along these two lines.  It just occurred to me that I can put the fabric on the reverse side and eliminate this step!


Pin your solid color fabric in the center, leaving at least 1/4" fabric allowance on each edge.


add various sized strips to each side to cover the paper all the way to the edge.


press the paper and fabric to make it behave.


trim along all edges, right up to the paper.


it's looking pretty!


repeat three more times


play around with your triangles until you have them arranged just so


with the paper still attached, sew the triangle blocks together, then remove the papers.


viola!
 I should mention that you should use a small stitch width so that the papers are easy to rip off of the fabrics.  I used two different ways to sew the strips together, 1. sewing the papers and strips together (like paper piecing) and 2. just sewing a bunch of strips together and then placing on the edge.  The second method was easier, but I liked sewing to the paper for stability and for using up my really small scraps.  

Happy sewing!

June 30, 2012

Swimsuit for ME!

I've taken a few deep breaths and I'm ready to share photos of my swimsuit!  This blog post is a good exercise in body image confidence!

Anyways, I was looking at swimsuits at anthropologie.com and decided to borrow a few style elements.  I liked the curves on the bikini tops and also the ruffles.  Those two elements are also supposed to give the illusion of a bust to those less gifted (like myself).  My bust is extremely out of proportion with my hips.  But, back to the topic.  It's hard to see in the photos, but the light blue fabric has off white polka dots.  Gingham and polka dots, that's how I roll!

Without further apology, here is my new suit!  


I copied the bottoms from a target swimsuit I wore last year.  I would ideally like more coverage in the front, and a little more width in the back.  Next time...

Just so I'm not the only one in a swimsuit in this post, here is Lucy sporting her mama made suit.  (she's with my Mom and Hattie)

A little girl at the pool noticed we had matching fabrics in our swimsuits and when I mentioned that I sewed our suits, she said "You can DO THAT?" with large eyes and a amazed expression.  That's pretty much the bewilderment I am going for every time I show my husband something I've made.  He raised his eyebrows at my double welt, buttoned pockets last night and said "Nice".  (for a Minnesotan, that's a pretty deal!)

 Here we are at the cabin, warming up after the frigid water.  I opted to keep my suit on, unlike my free spirited daughter.  

Happy summer everyone!

June 22, 2012

Sewing Swimsuits

I've just started sewing swimsuits (um, last month!) and I love it!  It really IS easy - no joke!  This suit for Lucy was made from a remnant at Joann's for 1.83!  The great thing about swimsuits is they take so little fabric and the stretch is very forgiving. 


Lucy looks so Parisian with the red tie on the front.  The swimsuit has been a big hit and she asks to wear it first thing in the morning.

If there is interest, I'll scan and upload the pattern I made.  I also have made a suit for myself but I'm wary about posting a photo!  We'll see.

Harriet also has a suit in the works.  She seems like more of a bikini girl.  I think I'll add some ruffles too!


June 20, 2012

Summer Sewalong - Shorts on the Line

shorts on the line button

I'm so excited to tell you about this event!! This july, imagine gnatsDesigns by Sessa, and small + friendly will be hosting "shorts on the line", a summer sewalong. 

For the first three weeks in july, we'll be sharing guest posts with shorts inspiration, tutorials, and pattern reviews. Those sewing along at home will have a chance to be featured in our sewalong round-up posts the last week of july.... and some *great* prizes, including fabric, patterns, and gift certificates!

HERE IS THE SCHEDULE:

7.1 shorts on the line kick-off!

week one: imagine gnats
7.2 Rachael (imagine gnats) and Melanie (A Sewing Journal)
7.3 Courtney (mon petit lyons), Inder (Inder Loves Folk Art), and Nicke (Kiss Kiss... Quilt)
7.4 Rashida (i heart linen) and April (Sewing Novice)
7.5 Andrea (the train to crazy) and Kristy (Hopeful Threads)
7.6 Shannon (luvinthemommyhood) and Erin & Carla (Clever Charlotte)
7.7 Emma (Hello Beautiful) and Cassandra (Cass Can Sew)
7.8 Gail (probably actually) and Becky (Owly Baby)

week two: small + friendly
7.9 Carla (small + friendly) and Sophie (cirque du bebe)
7.10 Ros (Sew Delicious) and Veronica (sewVery)
7.11 Shelly (Figgy's) and Alyssa (Pile O'Fabric)
7.12 Jessica (a little gray) and Diane (from blank pages)
7.13 Kristin (skirt as top) and Kelley (Casa Crafty)
7.14 Katie (There and Back) and Tara (girl like the sea)
7.15 Alli (B. Yazoo) and Jennet (Feathered Nest Studios)

week three: Designs by Sessa
7.16 Vanessa (Designs by Sessa) and Jessica (Me Sew Crazy)
7.17 Cherie (You and Mie) and Jane (Buzzmills)
7.18 Karen (Sew Well Maide) and Stephanie (The Crafty Kitty)
7.19 Bianca (Sweet Diesel Designs) and Tara (true, pure, lovely)
7.20 Jenny (Stumbles & Stitches) and Susan & Adrianna (crafterhours)
7.21 Danny (Mommy for Reals) and Marian (Lady Face)
7.22 Jill (Made With Moxie) and Christina (2 Little Hooligans)

features and deadline
7.23 sewalong features, Rachael's favorites
7.24 sewalong features, Carla's favorites
7.25 sewalong features, Vanessa's favorites
7.26 final deadline for shorts sewalong entries
7.27 viewers choice voting begins

winners annoucements
7.28 judges' choice third place announced
7.29 judges' choice second place announced
7.30 viewers choice winner announced
7.31 judges' choice first place announced

the full sponsor list and guest judge line-up will be coming soon. until then, get ready by joining the shorts on a line flickr group and check out our shorts on the line pinterest board for some short-y inspiration.

grab the code and share the button!


June 7, 2012

Summer sewing!

I've been busy doing  "summer sewing" projects!  Baseball uniforms, aprons, hems, alterations, curtains, wiksten tank tops, shorts, and so much more!  I honestly don't have enough time in one day to complete 1/100th of the things on my "To Sew" list. 

We have also been enjoying the wonderful weather.  Ice cream cones, backyard explorations, and trips to the zoo are our favorites.


What's on your "to sew" list? 
I'd love to make a chiffon button down top and a chambray dress.

March 31, 2012

Baby Quilt for a friend

I finally have something to share! I have been sewing and quilting and crafting, but have lacked the time and energy to show the online world! Sometimes when you finish a project you're really proud of, it feels nice to show it off a little bit.

This little quilt (45" x 60") was given to two wonderful soon-to-be parents this morning. It felt wonderful to be able to give them a handmade gift and I secretly love imagining a little baby laying on this quilt. The sex of the baby is a surprise!

Now, back to all things quilty! I made some wonky stars for the middle and did some bias "caution tape" border.  I really like the finished results!

I just have to note that the quilt is entirely straight, the edges aren't wavy at all.  It only appears that way becauase it's resting lightly on the (long) grass. 


 It's nothing exciting, but I like the star on the backing.

 Here is my favorite part of the back!  The Minnestoa Grown! (We live in MN)


February 6, 2012

Curved Nine Patch Block Tutorial

February Block Inspirations by owlybaby
February Block Inspirations, a photo by owlybaby on Flickr.

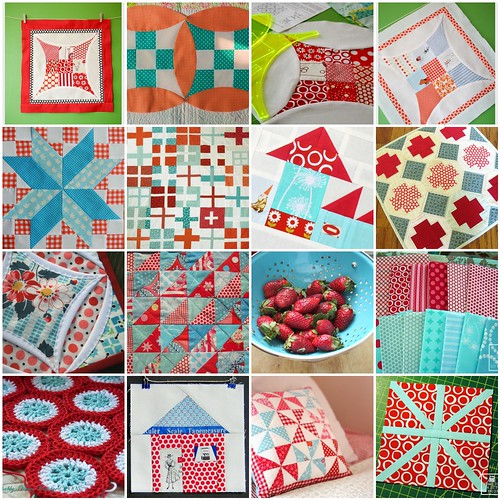
These are my inspiration photos for my February Bits and Pieces Bee.  The top 4 photos (row 1) show the block that we will be making and the bottom 3 rows show my color inspirations.  I know I'm super late to the aqua and red party, but the colors look so fresh together.  Especially when I see juicy strawberries in a beautiful aqua colander! 


The pattern for this block can be found HERE.  It's a free pattern from ConnectingThreads.com called Curved Nine Patch.  You will only need to print out the last page of the document with the template pieces.  

I'm hoping people will do either 1 block of red and 1 block of aqua OR two blocks of aqua.  I was pulling fabrics from my stash and noticed that I have lots of red fabrics but very few aqua fabrics.  If you aren't afraid of curved piecing, it would be great if you could add the white curve to 2 sides of each block.  You don't need to add it to each side because the block "share" this piece. (this is not shown)


CURVED NINE PATCH TUTORIAL
So, let's get started! These instructions will cover the steps you will take to complete one block.  

You will need the template pieces A, B, C and D.  We are going to modify template piece D.  
To modify piece D - Cut out the template piece on the solid lines for the curved side and notches for cutting at the top and bottom.  Cut along the DOTTED LINE for the long straight edge.  Then, on a new sheet of paper, trace around the entire piece.  Flip the pattern piece right side down and align the long straight edge of the template with the long straight edge that you have just drawn.  Trace the curve and notches on this side.  You will end up with a long oval-ish template piece.  This is the new template D.  Don't worry too much about marking the middle.  


Now, you will need to gather your fabrics and cut the following pieces.  
Piece A - cut 1.  This is the center block.  
Piece B - cut 4.  Notice the slight curve in one side.  
Piece C - cut 4.  
Piece D - use white fabric.  Cut 2 per block. 

Arrange your pieces until you are happy with the layout. 


Now comes the sewing! Join the pieces using a .25" seam allowance.  Sew 3 rows of squares together.  Don't forget to face the curved edge on piece B to the outside.  Yes, I changed my layout - sorry about that! 
Now, join your rows.  I pressed my seams open, but I don't think it will matter too much in this block.
Make another block, if desired.  


Follow these directions to add the curved white piece.  Never fear, curved piecing is a breeze and nothing to be worried about.  First, fold piece D and your nine patch block to find the centers.  Match the centers up and pin.  


Then, match up each corner piece and pin.  If you are brave or experienced, you can usually skip this part. 
If pins make you feel more in-control, add one more pin between the center and edges on each side. 

Now, I find it easiest to sew with the convex piece on the bottom.  Sew along the curved edge, matching edges as you go.  Take care not to stretch or pull fabrics, but gently guide the edges so they curve together.  I like to match the edges as I go and work 3 inches or so in front of the presser foot.  Notice - to the left of the presser foot there are *gasp* bubbles.  These are necessary at this point.  They will extend almost to the .25" seam allowance but not to the edge.
After sewing, you will have a bowl-ish shaped edge. 
March it over to your pressing board and press the seam allowance away from the white piece.  
 Now, repeat the last step for one other edge.  How about we all plan to do the opposite edge? 

If you'd like to know how to join the pieces together to make a quilt, just continue adding nine patches and curves until it's you're desired size.


Thanks so much to the great ladies from the Bits and Pieces Quilting Bee.  I'm so excited to see your blocks!!  Also - if you don't have enough fabric of the correct color to make a block, let me know and I'll happily mail you a package! 
Related Posts Plugin for WordPress, Blogger...