Showing posts with label inspiration. Show all posts

February 14, 2012

Rainbow Barf

I feel like I have a dirty secret.  The secret is this quilt I've been working on for ME!  I have made quite a few quilts now, but never a quilt for myself.   This quilt has been affectionately dubbed "Rainbow Barf" around our home - mostly for the obnoxious use of color and the arcs shapes.

When I decided I wanted to make a quilt for myself, I planned and schemed and researched and finally decided to do a pickle dish/double wedding ring quilt.  I can't tell the difference between those two patterns.  I was inspired by the awesome quilt in the book Material Obsession 2.
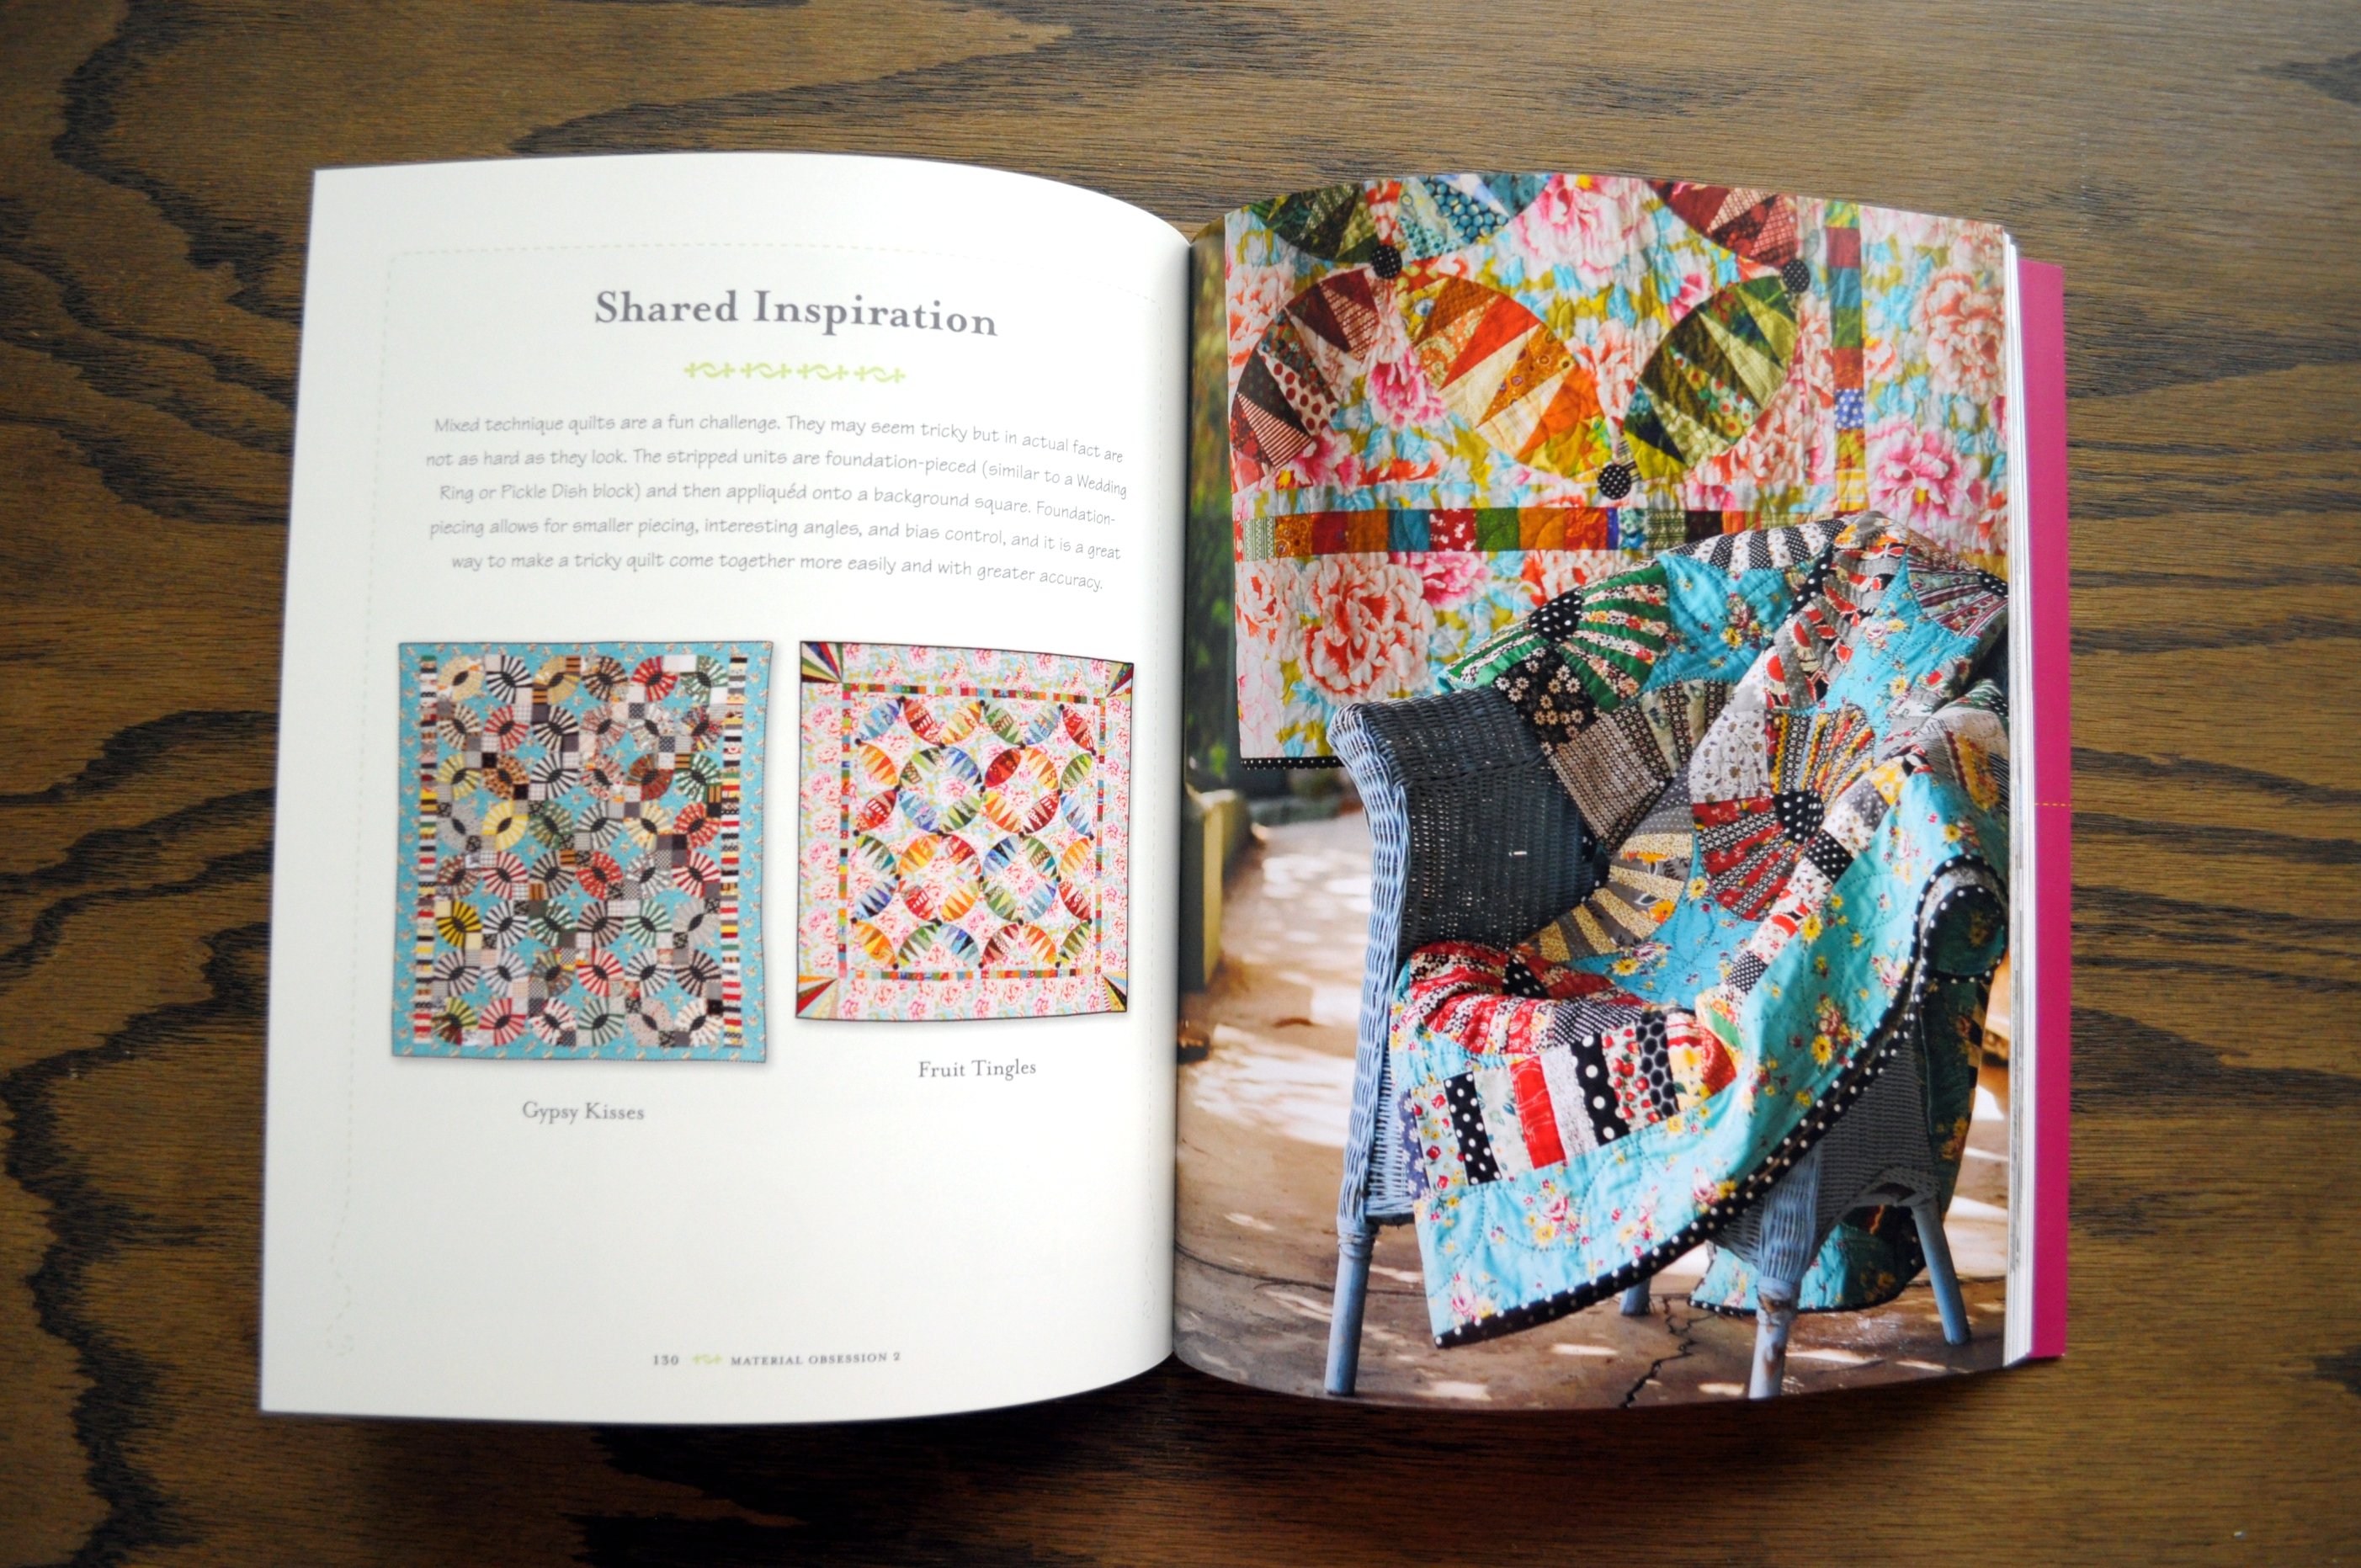
Material Obsession 2
Can you see it, on the left and draped on the chair?
(photo from "http://www.flickr.com/photos/theworkroom/)

I'm far too cheap to purchase a pattern, so I drafted up the pattern on the computer and set to work cutting and piecing.  It hasn't taken too long, I've been working on the quilt for about 1 month at various intervals between LOTS of other sewing.


 These are some of my favorite combos.  I have no idea why!  They can be a bit in-your-face color-wise.


The quilt has a scrap of *almost* every fabric I own!  It's been very fun to match the arc fabrics based on value (light/dark) instead of by color.  To match them I used my camera in black and white mode and took photos of the fabrics. This ensures that there is a good amount of contrast in the arcs.  Sometimes if you just squint really hard at the fabrics - you can get a good test of value.  If the colors both mesh together (like the light purple and green in the photo below), then there isn't much value difference.  If one color stands out (like the woodgrain and pink tiles below) there is a high contrast/difference in value.


I'm using polyester batting *gasp* because I don't like heavy quilts.  This baby is BIG!  It's about 82" x 82".  I've just started the hand quilting and it's been very relaxing! The backing is a large 1" check gingham in a mint color - you can see it at the bottom left and right on the photo below.


This last photo shows how I've been quilting it.  I'm skipping every other "ray" and quilting with perle cotton in size 10. 

I feel much better now that I've shared my "secret" (and selfish?) quilt.

February 6, 2012

Curved Nine Patch Block Tutorial

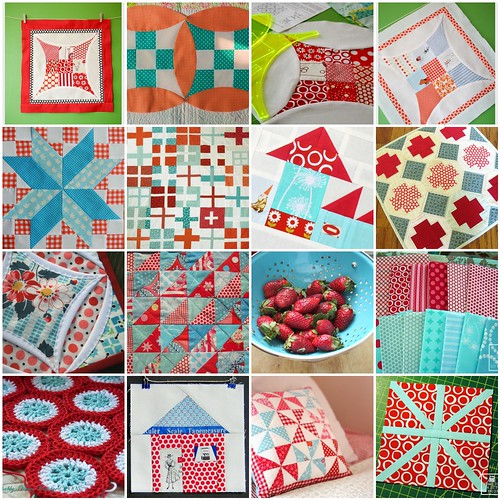
February Block Inspirations by owlybaby
February Block Inspirations, a photo by owlybaby on Flickr.

These are my inspiration photos for my February Bits and Pieces Bee.  The top 4 photos (row 1) show the block that we will be making and the bottom 3 rows show my color inspirations.  I know I'm super late to the aqua and red party, but the colors look so fresh together.  Especially when I see juicy strawberries in a beautiful aqua colander! 


The pattern for this block can be found HERE.  It's a free pattern from ConnectingThreads.com called Curved Nine Patch.  You will only need to print out the last page of the document with the template pieces.  

I'm hoping people will do either 1 block of red and 1 block of aqua OR two blocks of aqua.  I was pulling fabrics from my stash and noticed that I have lots of red fabrics but very few aqua fabrics.  If you aren't afraid of curved piecing, it would be great if you could add the white curve to 2 sides of each block.  You don't need to add it to each side because the block "share" this piece. (this is not shown)


CURVED NINE PATCH TUTORIAL
So, let's get started! These instructions will cover the steps you will take to complete one block.  

You will need the template pieces A, B, C and D.  We are going to modify template piece D.  
To modify piece D - Cut out the template piece on the solid lines for the curved side and notches for cutting at the top and bottom.  Cut along the DOTTED LINE for the long straight edge.  Then, on a new sheet of paper, trace around the entire piece.  Flip the pattern piece right side down and align the long straight edge of the template with the long straight edge that you have just drawn.  Trace the curve and notches on this side.  You will end up with a long oval-ish template piece.  This is the new template D.  Don't worry too much about marking the middle.  


Now, you will need to gather your fabrics and cut the following pieces.  
Piece A - cut 1.  This is the center block.  
Piece B - cut 4.  Notice the slight curve in one side.  
Piece C - cut 4.  
Piece D - use white fabric.  Cut 2 per block. 

Arrange your pieces until you are happy with the layout. 


Now comes the sewing! Join the pieces using a .25" seam allowance.  Sew 3 rows of squares together.  Don't forget to face the curved edge on piece B to the outside.  Yes, I changed my layout - sorry about that! 
Now, join your rows.  I pressed my seams open, but I don't think it will matter too much in this block.
Make another block, if desired.  


Follow these directions to add the curved white piece.  Never fear, curved piecing is a breeze and nothing to be worried about.  First, fold piece D and your nine patch block to find the centers.  Match the centers up and pin.  


Then, match up each corner piece and pin.  If you are brave or experienced, you can usually skip this part. 
If pins make you feel more in-control, add one more pin between the center and edges on each side. 

Now, I find it easiest to sew with the convex piece on the bottom.  Sew along the curved edge, matching edges as you go.  Take care not to stretch or pull fabrics, but gently guide the edges so they curve together.  I like to match the edges as I go and work 3 inches or so in front of the presser foot.  Notice - to the left of the presser foot there are *gasp* bubbles.  These are necessary at this point.  They will extend almost to the .25" seam allowance but not to the edge.
After sewing, you will have a bowl-ish shaped edge. 
March it over to your pressing board and press the seam allowance away from the white piece.  
 Now, repeat the last step for one other edge.  How about we all plan to do the opposite edge? 

If you'd like to know how to join the pieces together to make a quilt, just continue adding nine patches and curves until it's you're desired size.


Thanks so much to the great ladies from the Bits and Pieces Quilting Bee.  I'm so excited to see your blocks!!  Also - if you don't have enough fabric of the correct color to make a block, let me know and I'll happily mail you a package! 

September 15, 2011

Quilt Blocks - 318 Patchwork Patterns

This is my test block for my new quilting bee group.  The group is called "geese in a ring" and there are some BEAUTIFUL blocks up so far!  I already feel like I'm falling behind!

This is my new quilting book.  It's called 318 Patchwork Patterns by Kumiko Fujita.  You do need to know a bit about paper piecing because there are no instructions (and it's in Japanese). 


I can't wait to try the ice cream cone block.

Or this adorable duck block.  Perfect for a baby quilt.  Look at how the stripes match up...amazing!

This is probably my favorite page so far.  I'm savoring the book...ever so slowly studying each page.

August 31, 2011

The Great Minnesota Get Together!

Hello from the Minnesota State Fair!

We had a marvelous time at the fair.  
We ate some alligator, cookies and cheese curds.  

We explored all of the barns and marveled at the animals.  


Lucy especially liked the pigs and goats.


I liked looking at the quilted arts.
  This one was king sized.


Both of the girls were thoroughly exhausted and fell asleep in the car about 2 minutes after getting strapped into their car seat.  
This shot of Charlie and Lucy is my favorite.
Just one of the wonderful memories we've been creating this summer.   

August 4, 2011

DIY Upholstery

The ingredients:

My grandmothers chair
Staple Gun
Denyse Schmidt County Fair Fabric
Foam and Batting
Stain and Polyurethane
Sandpaper


Place in a garage in 97 degree heat, 70 percent humidity for 6 hours.  Add a sprinkle of perspiration and determination.

BEFORE


Slightly old foam - did I mention that my grandmother's chair she received as a wedding present over 55 years ago?

DURING


Tea Party (I couldn't resist)
AFTER

My, what beautiful pleats you have!!!


The "new" chair sits in our living room and is my new favorite place to sit!

November 29, 2010

Christmas Dress Inspirations

While out shopping during the madness known as Black Friday - I came across some great deals (40% off everything in Banana Republic!) and some great inspiration for Christmas dresses!

Here's an idea for Lucy's dress - I love the ruffles and the gathered yoke.

I'm certainly NOT going to pay 44$ for a dress that will end up 
covered in cheerios and pickle juice.  
I'd rather spend 12$ and 4 hours making the pattern and dress!  
(does that sound insane?)

Here are some other ideas floating around in my head.


This Mod Cloth dress - I love the white crocheted details.  Maybe make it out of a comfy knit?

I'm definitely digging the front and center bows - especially when they're tastefully done. 


But sometimes bows can be tricky - and end up a little on the deep end.


I've also thought of going non-traditional and making a blue and white satin peasant dress with a bright yellow sash. We'll see.

I'm very pregnant and at Christmastime I'll be ready to pop.  
I don't feel like making a dress that could cover a parade float.  
If I did make a dress for me - it would probably resemble this dress from Mod Cloth. (my favorite source of dress inspiration)
Don't forget there is only one more day of 30% off all Owly Baby purchases!!  


Use the code: NOVEMBER10
Related Posts Plugin for WordPress, Blogger...