Showing posts with label flea market fancy. Show all posts

September 17, 2012

Spiderweb Block tutorial and template


I've been slowly catching up on my sewing projects.  Preschool has started and so I have a few extra hours a week to work.  This is my first spiderweb block for Lee in my Bits and Pieces quilting bee group.  I hope to finish the other block tonight!  The finished block measures 10 3/4 inches.


The block Lee designed for her quilt and her tutorial can be found here:
Naturally Neutral and Webby Quilt.   
I've made a free template based on her instructions that you can download and print HERE.  


I'll show you the process of making this quilt block - if you scroll down really fast, maybe it will look animated! 


print out the template on 8.5 x 11 paper


cut along the dotted lines


Fold along these two lines.  It just occurred to me that I can put the fabric on the reverse side and eliminate this step!


Pin your solid color fabric in the center, leaving at least 1/4" fabric allowance on each edge.


add various sized strips to each side to cover the paper all the way to the edge.


press the paper and fabric to make it behave.


trim along all edges, right up to the paper.


it's looking pretty!


repeat three more times


play around with your triangles until you have them arranged just so


with the paper still attached, sew the triangle blocks together, then remove the papers.


viola!
 I should mention that you should use a small stitch width so that the papers are easy to rip off of the fabrics.  I used two different ways to sew the strips together, 1. sewing the papers and strips together (like paper piecing) and 2. just sewing a bunch of strips together and then placing on the edge.  The second method was easier, but I liked sewing to the paper for stability and for using up my really small scraps.  

Happy sewing!

March 31, 2012

Baby Quilt for a friend

I finally have something to share! I have been sewing and quilting and crafting, but have lacked the time and energy to show the online world! Sometimes when you finish a project you're really proud of, it feels nice to show it off a little bit.

This little quilt (45" x 60") was given to two wonderful soon-to-be parents this morning. It felt wonderful to be able to give them a handmade gift and I secretly love imagining a little baby laying on this quilt. The sex of the baby is a surprise!

Now, back to all things quilty! I made some wonky stars for the middle and did some bias "caution tape" border.  I really like the finished results!

I just have to note that the quilt is entirely straight, the edges aren't wavy at all.  It only appears that way becauase it's resting lightly on the (long) grass. 


 It's nothing exciting, but I like the star on the backing.

 Here is my favorite part of the back!  The Minnestoa Grown! (We live in MN)


February 14, 2012

Rainbow Barf

I feel like I have a dirty secret.  The secret is this quilt I've been working on for ME!  I have made quite a few quilts now, but never a quilt for myself.   This quilt has been affectionately dubbed "Rainbow Barf" around our home - mostly for the obnoxious use of color and the arcs shapes.

When I decided I wanted to make a quilt for myself, I planned and schemed and researched and finally decided to do a pickle dish/double wedding ring quilt.  I can't tell the difference between those two patterns.  I was inspired by the awesome quilt in the book Material Obsession 2.

Material Obsession 2
Can you see it, on the left and draped on the chair?
(photo from "http://www.flickr.com/photos/theworkroom/)

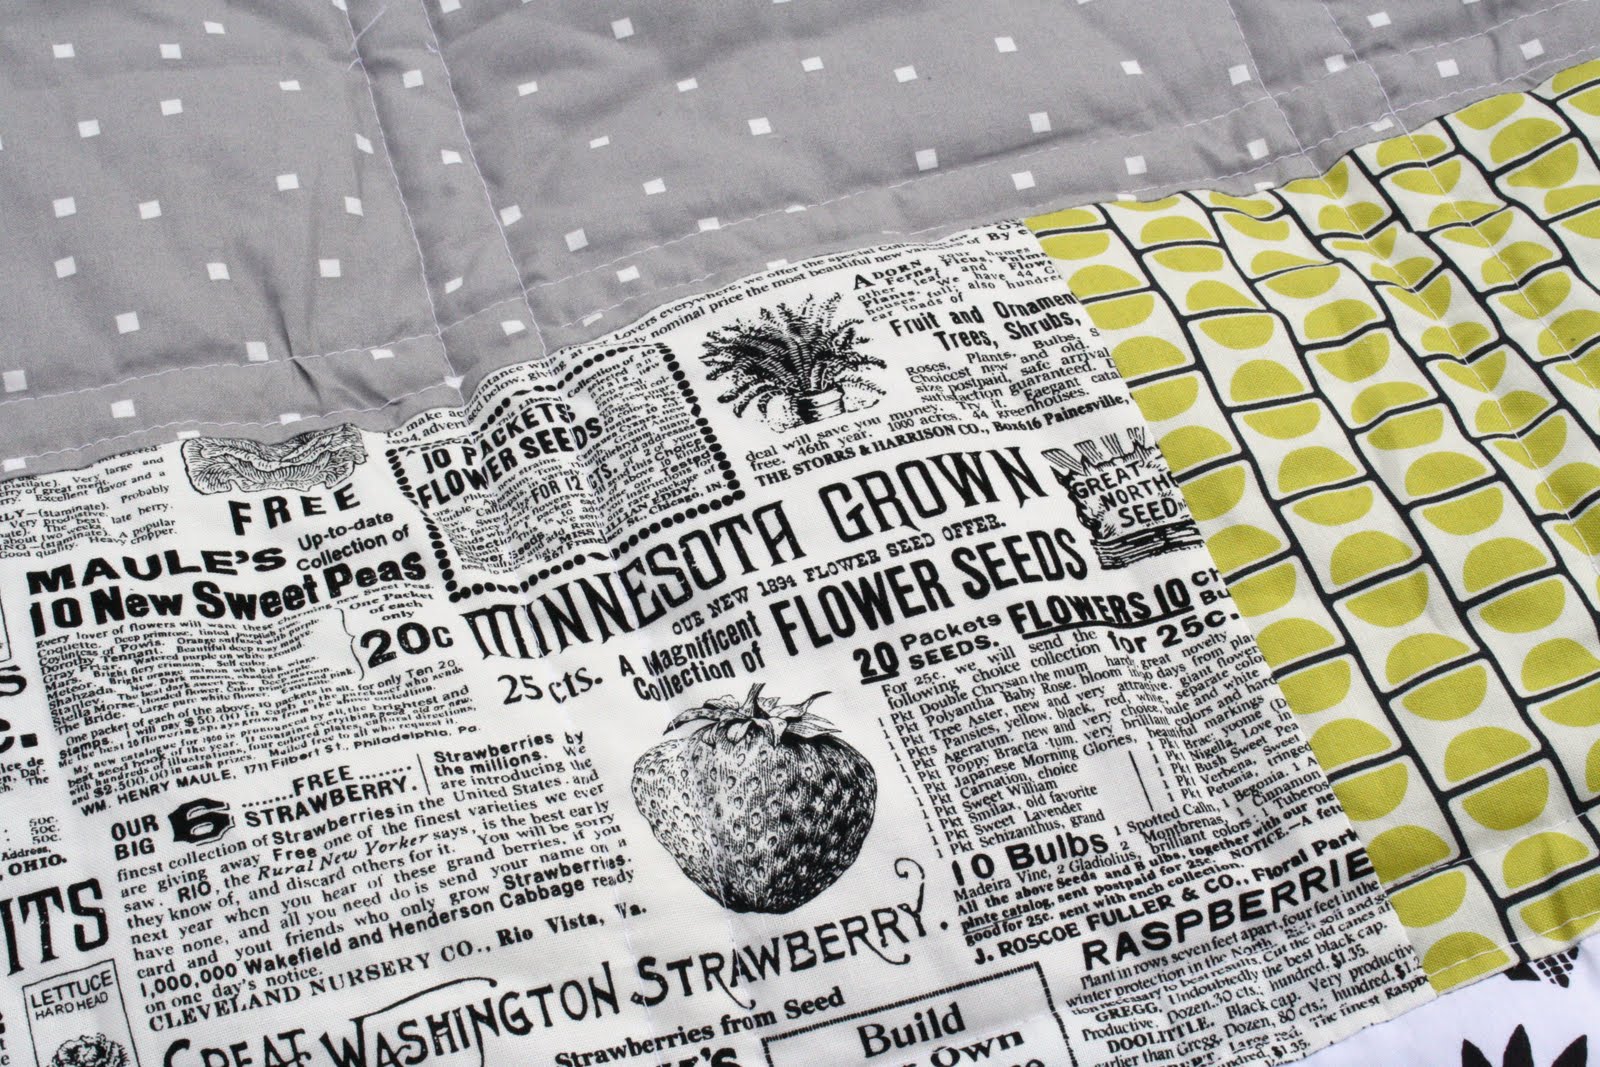
I'm far too cheap to purchase a pattern, so I drafted up the pattern on the computer and set to work cutting and piecing.  It hasn't taken too long, I've been working on the quilt for about 1 month at various intervals between LOTS of other sewing.


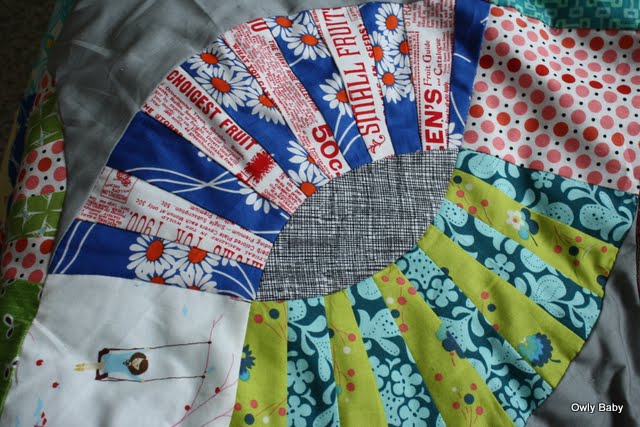
 These are some of my favorite combos.  I have no idea why!  They can be a bit in-your-face color-wise.


The quilt has a scrap of *almost* every fabric I own!  It's been very fun to match the arc fabrics based on value (light/dark) instead of by color.  To match them I used my camera in black and white mode and took photos of the fabrics. This ensures that there is a good amount of contrast in the arcs.  Sometimes if you just squint really hard at the fabrics - you can get a good test of value.  If the colors both mesh together (like the light purple and green in the photo below), then there isn't much value difference.  If one color stands out (like the woodgrain and pink tiles below) there is a high contrast/difference in value.


I'm using polyester batting *gasp* because I don't like heavy quilts.  This baby is BIG!  It's about 82" x 82".  I've just started the hand quilting and it's been very relaxing! The backing is a large 1" check gingham in a mint color - you can see it at the bottom left and right on the photo below.


This last photo shows how I've been quilting it.  I'm skipping every other "ray" and quilting with perle cotton in size 10. 

I feel much better now that I've shared my "secret" (and selfish?) quilt.

February 6, 2012

Curved Nine Patch Block Tutorial

February Block Inspirations by owlybaby
February Block Inspirations, a photo by owlybaby on Flickr.

These are my inspiration photos for my February Bits and Pieces Bee.  The top 4 photos (row 1) show the block that we will be making and the bottom 3 rows show my color inspirations.  I know I'm super late to the aqua and red party, but the colors look so fresh together.  Especially when I see juicy strawberries in a beautiful aqua colander! 


The pattern for this block can be found HERE.  It's a free pattern from ConnectingThreads.com called Curved Nine Patch.  You will only need to print out the last page of the document with the template pieces.  

I'm hoping people will do either 1 block of red and 1 block of aqua OR two blocks of aqua.  I was pulling fabrics from my stash and noticed that I have lots of red fabrics but very few aqua fabrics.  If you aren't afraid of curved piecing, it would be great if you could add the white curve to 2 sides of each block.  You don't need to add it to each side because the block "share" this piece. (this is not shown)


CURVED NINE PATCH TUTORIAL
So, let's get started! These instructions will cover the steps you will take to complete one block.  

You will need the template pieces A, B, C and D.  We are going to modify template piece D.  
To modify piece D - Cut out the template piece on the solid lines for the curved side and notches for cutting at the top and bottom.  Cut along the DOTTED LINE for the long straight edge.  Then, on a new sheet of paper, trace around the entire piece.  Flip the pattern piece right side down and align the long straight edge of the template with the long straight edge that you have just drawn.  Trace the curve and notches on this side.  You will end up with a long oval-ish template piece.  This is the new template D.  Don't worry too much about marking the middle.  


Now, you will need to gather your fabrics and cut the following pieces.  
Piece A - cut 1.  This is the center block.  
Piece B - cut 4.  Notice the slight curve in one side.  
Piece C - cut 4.  
Piece D - use white fabric.  Cut 2 per block. 

Arrange your pieces until you are happy with the layout. 


Now comes the sewing! Join the pieces using a .25" seam allowance.  Sew 3 rows of squares together.  Don't forget to face the curved edge on piece B to the outside.  Yes, I changed my layout - sorry about that! 
Now, join your rows.  I pressed my seams open, but I don't think it will matter too much in this block.
Make another block, if desired.  


Follow these directions to add the curved white piece.  Never fear, curved piecing is a breeze and nothing to be worried about.  First, fold piece D and your nine patch block to find the centers.  Match the centers up and pin.  


Then, match up each corner piece and pin.  If you are brave or experienced, you can usually skip this part. 
If pins make you feel more in-control, add one more pin between the center and edges on each side. 

Now, I find it easiest to sew with the convex piece on the bottom.  Sew along the curved edge, matching edges as you go.  Take care not to stretch or pull fabrics, but gently guide the edges so they curve together.  I like to match the edges as I go and work 3 inches or so in front of the presser foot.  Notice - to the left of the presser foot there are *gasp* bubbles.  These are necessary at this point.  They will extend almost to the .25" seam allowance but not to the edge.
After sewing, you will have a bowl-ish shaped edge. 
March it over to your pressing board and press the seam allowance away from the white piece.  
 Now, repeat the last step for one other edge.  How about we all plan to do the opposite edge? 

If you'd like to know how to join the pieces together to make a quilt, just continue adding nine patches and curves until it's you're desired size.


Thanks so much to the great ladies from the Bits and Pieces Quilting Bee.  I'm so excited to see your blocks!!  Also - if you don't have enough fabric of the correct color to make a block, let me know and I'll happily mail you a package! 

October 5, 2011

Bicycles Quilt

Things have been moving around here!  I started and finished Hattie's Bicycles quilt.  She told me that it was her favorite quilt ever!  It's my favorite too!  I used Heather Ross' Bicycles print, some pink scraps and a bit of Flea Market Fancy.


It has nine wonky stars with glow-in-the-dark hand quilting.  I added the strips at the top and bottom to make it a crib size quilt.  Here are a few more photos - just because it's my favorite quilt ever!!


I love gingham backing.  It's very soft and home-y.  Is that a word?

I also ran Twin Cities Marathon this weekend with my sister.  She beat me by 11 minutes - that stinker!  We're still smiling at the end so the event was a success.
 There we are in the center with our names on our shirts!  Becky and Vicky. 
 The speedy little sis.

I've also been sewing up a storm.  I'm working on a few new patterns (dresses, of course).  I've also sewn a custom quilt, pillows and bed skirt for a soon-to-arrive baby, some simple curtains for the church nursery, and a class set of chair-back bags/organizers for a local school.  Whew!  In between these crafts I've managed to begin some Christmas gifts.  I think I'm planning on an entirely handmade Christmas so it's good that I've already started!  Anyone else planning a handmade Christmas?  Tips?

I've completely forgotten about Halloween and have to come up with some costume ideas.  Our family of gnomes last year will be hard to beat.  I think animals might be easy with some sort of sweatshirt embellishment?
Related Posts Plugin for WordPress, Blogger...